Winter Wonderland Party Part Deux
Red Velvet Polka Dot Cake
This was the first buttercream smoothed cake I have done and I learned A LOT of techniques regarding how to get a smooth cake surface. This one did not turn out as I was hoping and I will explain why. Still cute though….
Problem 1: Wrong type of buttercream! To do the technique I wanted to try, you need to have a “crusting” buttercream meaning it will crust and become… well…. crusty when it dries. I had hurricane winds at my house this week and was out of power for a while so I kind of ran out of time (and energy) to make my own buttercream from scratch (a crusting one). I actually used store bought frosting …which does not crust well might I add. It is actually rather sticky. So, yeah, a bit of a headache for someone who was inexperienced at smoothing cakes. So I did my best. It is ok, but not at all what I wanted. I wanted to use the paper-towel method, which I will explain better next time when I can do it right… grrr.
Problem 2: I had no non-patterned paper towels. I have now vowed to only buy non-patterned paper towels so that when I need a smooth buttercream cake….I can have one. Before I discovered I had the wrong icing, I went ahead with the plan. But wait, dilemma….I’ve got a quilt for a paper towel. This did not turn out a pretty smooth buttercream (yes, I tried). So I attempted to use parchment paper instead. In a pinch, it could work but it was sliding all over the place and not cooperating. Paper towels could just form to your cake but parchment paper is just stiff and a pain. Save it for emergencies.
Problem 3: When starting to pipe borders…..start in the back. Being an inexperienced cake decorator as of right now, my borders were less than perfect. I don’t know why I didn’t start in the back first so I could smooth out my groove by the time I got to the front. …And then I accidentally did it again on the bottom border…gah. Live and learn.
Another reason why I am not liking store bought frosting for cakes is that it is difficult to pipe because of the stickiness. When I let go of the pressure and pulled away, the icing stuck to the tip and stretched out instead of breaking away. Not useful. Another demerit for store bought frosting.
Ok, so now that the “things-to-consider-when-decorating-your-cake” speech is over,
On to The Making Of….
Bake this
red velvet cake according to the recipe. Make three 8 inch round cakes. I made 2 batches of this recipe and the extra batter went to cake pops for my last dessert post! Efficiency at its finest.
When cool, wrap the cakes in plastic wrap and throw them in the fridge overnight or until they are cold and firm. Get out your cake decorating twirlybob stand and a 10 inch cake board circle for the cake to go on.
Next, level your cakes. If you have a cake leveler tool then your life will be easy (and I will assume you know how to use it for now). If you don’t, like moi, then you get to eyeball it. Using a long serrated knife, cut the dome off the top of the cake so it is flat. Do this for all your cakes.
Get your frosting ready. Any crusting buttercream frosting will do.
Now, take some frosting and smear it on the cake board where the cake will sit. This is going to act as glue so the cake isn’t sliding all over your cake board. Take a cake and place the flattest side up (probably the one that was against the pan). Using an offset spatula, smooth a thin layer of frosting onto the top of the cake. Stack another cake and frost again. Stack the last cake with the flattest side up. This will be important at this stage because this is the top of your cake!
Look to see if the sides of your cake are lined up straight. If there are any parts that are protruding out you can use the knife to gently cut them off to create a smooth side to the cake.
We are now going to give your cake a “crumb coat”.
This is a very thin layer of icing that captures all the loose crumbs, therefore the name.
To do this, thin out some of your “Top Coat” frosting with water. It should be thin so it is very easily spreadable but not soo thin that it drips down the cake. Using a spatula, take some of the frosting and place it on top of the cake. Spinning the cake on the twirlybob, spread the icing out over the whole top of the cake. Instead of lifting up on the spatula to take it off the frosting, which can cause more crumbs, try dragging or sliding it off sideways. If there is excess icing then push it over to be used on the side. This coating does NOT need to be pretty. We will be covering it up later. The goal is just to capture all the crumbs in a thin icing coat.
Let this dry. I prefer to let it dry in the fridge to firm up the cakes a bit.
Now we are ready to frost the cake for real. Take a big dollop of frosting with your spatula and place on top of the cake. Smooth it out as much as possible. We will also smooth it out more later. Do the same thing along the sides. Having the crumb coat makes it so you don’t rip up cake chunks during this process. Fill in any holes to create a relatively smooth surface. Now you are going to let this dry for about 15 minutes or until it crusts. Test to make sure it is dry by gently touching your finger to the cake. It should not stick at all but feel soft and dry to the touch. Now you will want to continue on with the paper towel method for smoothing the buttercream surface by placing the paper on the cake surface and gently smooth with your fingers or a fondant paddle.
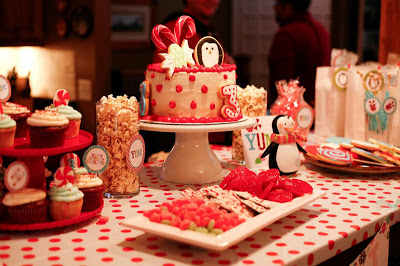
Once your buttercream is completely smooth you can move onto the decorations. Start with the piping. I used a 1/2 inch plain round tip for the borders. This is a plain bead border. You can make the bead any size you want. Just hold and press longer for a bigger bead like around the bottom of the cake. Evenly space round dots around the cake, as many or as few as you like, You can insert candy canes or other decorations into your cake by cutting a very thin slice of cake out with a small knife. This gives a small space big enough for the candy cane to stick into. Then I just stuck a few decorated sugar cookies into the icing. Done!
Cute Winter Wonderland Cake!
Related